
SET UPS & MAINTENANCE
RESTRING
STRING REMOVAL: The first step in restringing is carefully removing the old strings. This step involves: Loosening the tension to avoid damage to the guitar’s neck or bridge. Inspecting the nut, saddle, and bridge pins (for acoustic guitars) or tremolo system (for electric guitars) for wear or damage.
CLEANING AND INSPECTION: With the strings removed, technicians take this opportunity to clean and inspect the instrument: Fretboard Cleaning: Removing dirt, oils, and build up using specialized cleaners or conditioning products. Neck Inspection: Checking for fret wear, buzzing issues, or neck warping. Body Cleaning: Polishing the guitar's body for aesthetic and protective purposes.
STRING SELECTION: Matching the right strings to the player’s preferences and guitar type is crucial. This includes: Gauge Selection: Thicker strings for rich tones or thinner strings for ease of play. Material Choice: For example, phosphor bronze for warmth in acoustics or nickel-wound for versatility in electrics. Tuning Requirements: Advising on string types suitable for standard, drop tunings, or alternate setups.
RESTRING PROCESS: Precision is key when installing new strings: Stringing Technique: Properly securing the strings at the bridge and tuning pegs to prevent slipping. Tuning and Stretching: Gradually bringing strings to pitch and stretching them to stabilize tuning.
SET UP CHECK: A restring service often includes a basic setup check, which may involve: Adjusting the action (string height). Inspecting the truss rod for proper neck relief. Ensuring intonation is accurate.
FINAL CHECKS: After restringing, the technician tunes the guitar and plays it to ensure everything feels and sounds right. This ensures the guitar is ready for the player to enjoy immediately.
SET UPS
CLEANING AND MAINTENANCE: Fretboard Cleaning and Conditioning: Clean the fretboard and, if applicable, apply a conditioning oil (especially for rosewood or ebony fretboards). Polishing Frets: Buff the frets to a smooth, shiny finish for improved playability. Body Cleaning: Clean the guitar body to remove dirt, smudges, or grime.
STRING REPLACEMENT: String Removal: Carefully remove old strings while inspecting for neck movement or other issues. New Strings: Install a fresh set of strings suited to the player’s preference (gauge and type).
TRUSS ROD ADJUSTMENT: Neck Relief: Adjust the truss rod to achieve the correct neck curvature for a balance between comfort and tone. This prevents fret buzz and ensures proper string action.
ACTION ADJUSTMENT: String Height: Adjust the action (string height) at the nut and bridge to match the player’s preference or playing style (e.g., low action for faster playing, higher for slide guitar).
INTONATION ADJUSTMENT: Saddle Adjustment: Fine-tune the saddle(s) to ensure each string plays in tune across the fretboard. Tuner Check: Use a high-precision tuner to verify intonation after adjustments.
NUT ADJUSTMENT: Slot Filing: File the nut slots for correct string height and spacing, minimizing tuning issues and improving playability.
BRIDGE AND SADDLE WORK: Height and Angle: Adjust the bridge and saddle for optimal string action and intonation. Tremolo Calibration (if applicable): Adjust the tremolo system for the desired balance and functionality (e.g., floating or flat against the body).
FINAL TEST: Playthrough: Test the guitar across various styles and techniques to ensure it meets the player’s requirements. Fine-Tuning: Make any last-minute adjustments to meet optimal performance.
WIRING
ASSESSMENT AND DIAGNOSIS: What we do: Examine the guitar’s wiring for issues such as crackling sounds, signal loss, poor grounding, or unresponsive controls. Faulty or loose connections. Damaged pots (potentiometers), switches, or output jacks. Grounding issues causing hum or buzz. Outdated components no longer performing optimally.
REPAIRS: Simple fixes: Re-soldering loose connections, replacing frayed or broken wires. Replacing damaged components: Faulty switches, jacks, or potentiometers are replaced with high-quality parts.
UPGRADES: Why upgrade? Enhance tone, versatility, and reliability. Installing higher quality pots for smoother control. Upgrading capacitors for more nuanced tone control. Replacing stock wiring with premium shielding to reduce noise.
CUSTOMISATION: Tailored wiring setups: Create custom configurations for unique tonal possibilities. Coil-splitting or coil-tapping for humbuckers. Series/parallel switching for versatile pickup combinations. Kill switches for on-stage effects. Custom pickup wiring (e.g., active/passive switching or custom phase options).
COMPLETE REWIRING: When it’s needed: For vintage guitars, heavily modified instruments, or those with irreparable wiring damage. What we do: Remove all old components and replace them with new wiring harnesses, pots, capacitors, switches, and jacks.
TESTING AND FINAL SET UP: Ensuring perfection: After completing the wiring work, each guitar is tested for functionality, tone, and noise reduction. Adjustments are made to fine-tune performance.
NUT REPLACEMENT
WHAT IS A GUITAR NUT?: The nut is a small but essential component located at the end of the fretboard, closest to the headstock. It holds the strings in place, maintaining proper spacing and height above the fretboard. A well-crafted nut ensures: Accurate intonation, Comfortable action, Smooth tuning and string movement.
SIGNS YOUR GUITAR MIGHT NEED A NEW NUT: Cracks or Chips: Visible damage can affect string alignment and tone. String Buzzing or Rattling: Worn or improperly cut slots can lead to buzzing. Difficulty Tuning: Poor string movement through the slots can make tuning unstable. High or Low Action: A nut that’s too high or low can make the guitar harder to play or cause fret buzz. Material Degradation: Over time, materials like plastic can wear out, affecting sound quality.
OUR PROCESS: Assessment: We carefully inspect your guitar to determine if the nut needs replacement or if adjustments (like filing or lubrication) can solve the issue. Removal: The old nut is safely removed without damaging the neck or finish. Material Selection: Choose from a range of high-quality nut materials, such as: Bone: Renowned for its superior tone and sustain. Graphite: Ideal for smooth tuning and tremolo use. Tusq: Synthetic material with consistent tone and durability. Brass or Other Options: For unique tonal characteristics.
Precision Crafting: We shape and slot the new nut to match your guitar's specifications, ensuring perfect string spacing, height, and alignment. Installation and Adjustment: The nut is securely installed, and final adjustments are made for optimal playability and intonation. Polishing and Setup: The nut is polished, and the guitar is fine-tuned to your preferences.
BENEFITS OF A PROPERLY REPLACED GUITAR NUT: Enhanced tone and sustain Improved tuning stability, Comfortable playability, Increased longevity of your instrument.
COSMETIC REPAIRS
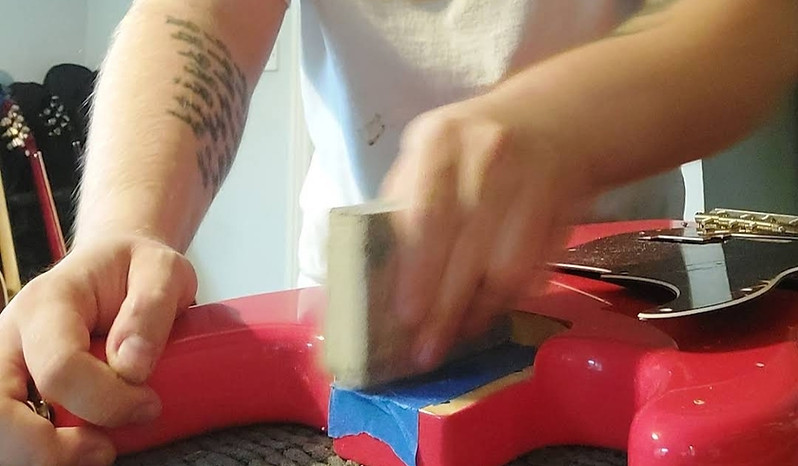
SCRATCH AND DENT REPAIR: Process: Using fine abrasives, buffing compounds, or specialized fillers to eliminate or reduce the visibility of scratches, dents, and dings on the guitar’s surface. Materials: Touch-up paint or wood fillers matched to the guitar's finish.
FINISH REPAIRS: Scope: Restoring damaged lacquer, nitrocellulose, polyurethane, or other finishes. This includes repairing chips, cracks, and areas where the finish has worn away. Techniques: Spot refinishing, wet sanding, polishing, and buffing.
FINGERBOARD AND HEADSTOCK TOUCH-UPS: Repairing cosmetic damage to fretboards (e.g., wear spots or scratches). Repainting or reapplying logos and designs on headstocks. Colour Matching and Stain Restoration Recreating original colours or wood stains to seamlessly blend repairs with the existing finish. Matching sunburst patterns, solid colours, or natural finishes. Binding Repairs Fixing cracked, chipped, or discoloured binding to restore the instrument's original look. Inlay Restoration or Replacement Repairing damaged inlays (dots, shapes, or custom designs) or replacing missing ones with precise craftsmanship. Hardware Cleaning and Polishing tarnished metal parts like tuning pegs, bridges, and pickups to make them shine like new. Replacing missing or mismatched screws or hardware with original or compatible parts.Pickguard and Plastic Components Replacing scratched or broken pickguards, truss rod covers, and back plates. Repainting or buffing existing plastic components for a clean appearance. Sticker or Residue Removal Safely removing stickers, adhesive residue, or other foreign substances without damaging the finish. Custom Aesthetic Enhancements (Optional) Adding unique touches such as custom finishes, graphics, or relicing effects for players who want their guitar to stand out.
WHY COSMETIC REPAIRS MATTER: Value: Cosmetic repairs can maintain or increase the resale value of the guitar. Player Confidence: A well-maintained guitar inspires confidence and pride in ownership. Longevity: Proper cosmetic care can prevent deeper damage, such as moisture seeping into unprotected wood.
FRET LEVELLING
ASSESSMENT OF THE NECK AND FRETS : The first step in fret levelling is to inspect the guitar thoroughly. We look for signs of fret wear, bowing of the neck, and any uneven spots across the frets. This is done by checking the overall neck relief (the slight curvature of the neck) and noting areas where the frets are not level.
MASKING THE FINGERBOARD: Before we begin the levelling process, the fingerboard (the wood portion of the neck) is carefully protected with masking tape. This prevents any damage to the delicate surface while we work on the frets.
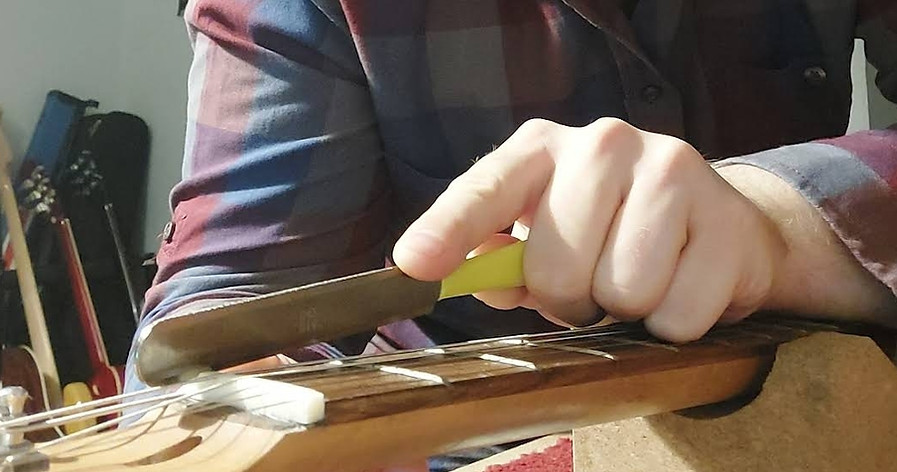
LEVELLING THE FRETS: Using specialized tools, we level the frets to ensure they’re all at the same height. The most common tool is a precision fret levelling file, which is used to shave down the high spots of the frets, allowing all the frets to make consistent contact with the strings. We often use a levelling beam for this, ensuring an even and controlled cut.After levelling, the frets are carefully checked again for any remaining inconsistencies. This step might involve further adjustments, and we check fret height using specialized tools like a fret rocker to ensure every fret is level.
FRET CROWNING: Once the frets are level, we “crown” them, which means reshaping the top of the fret to a rounded profile. This is crucial for playability, ensuring that each fret makes clean contact with the string, preventing buzzing and poor intonation.
POLISHING AND FINISHING: The final step is polishing the frets to a mirror-like shine. This not only improves the aesthetics of the guitar but also helps prevent corrosion and ensures a smooth playing surface for your fingers.
WHY SHOULD YOU GET A FRET LEVELLING?: Prevent Buzzing and Dead Notes: Uneven frets can cause unwanted buzzing or "dead" notes, especially when pressing down hard on the strings. A fret levelling ensures all notes ring clearly.
